How to Create Your CSR on Windows Server 2016 Using IIS 10
Using IIS 10 to Create Your CSR
- In the Windows start menu, type Internet Information Services (IIS) Manager and open it.
- In Internet Information Services (IIS) Manager, in the Connections menu tree (left pane), locate and click the server name.
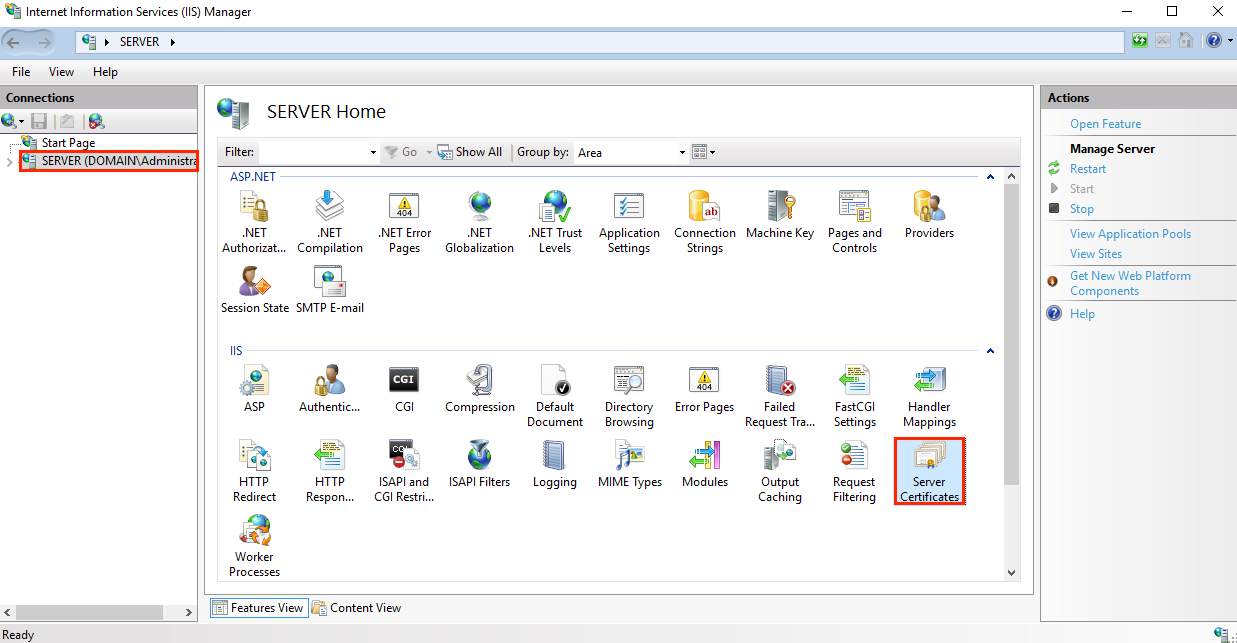
- On the server name Home page (center pane), in the IIS section, double-click Server Certificates.
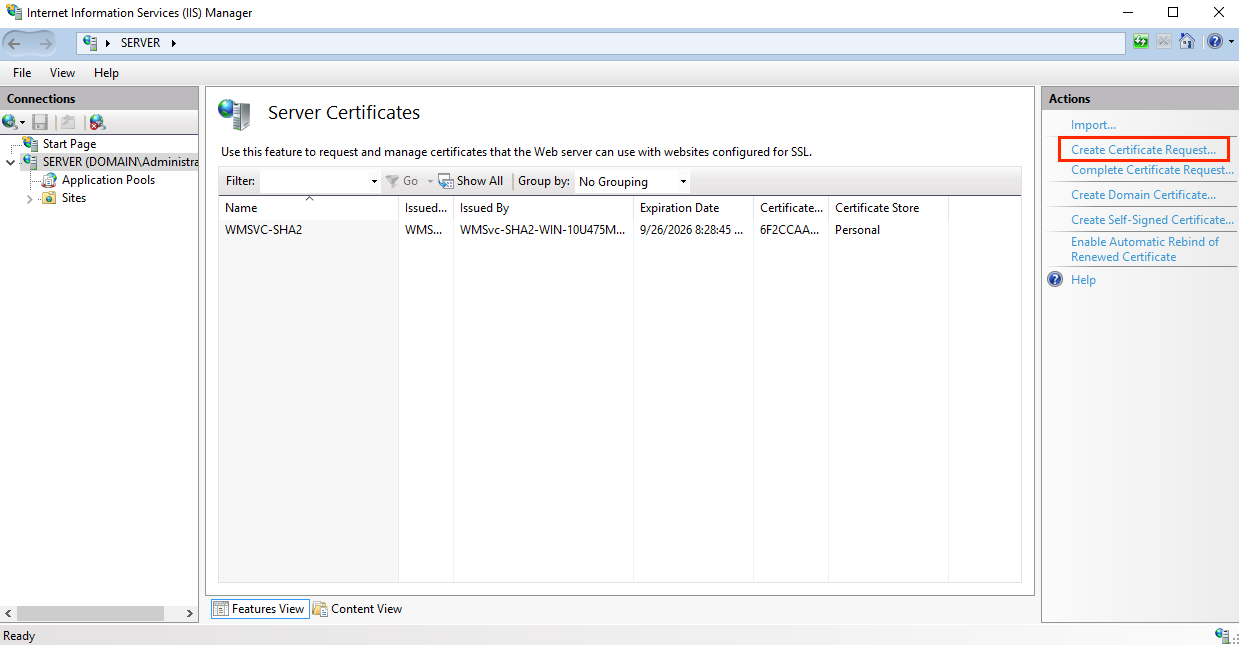
- On the Server Certificates page (center pane), in the Actions menu (right pane), click the Create Certificate Request… link.
-
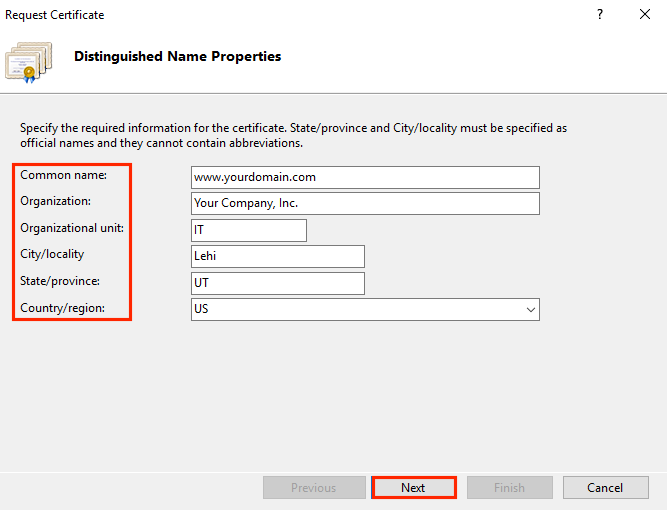
In the Request Certificate wizard, on the Distinguished Name Properties page, provide the information specified below and then click Next:
Common name: Type the fully-qualified domain name (FQDN) (e.g., www.example.com).
Organization: Type your company’s legally registered name (e.g., YourCompany, Inc.).
Organizational unit: The name of your department within the organization. Frequently this entry will be listed as "IT", "Web Security," or is simply left blank.
City/locality: Type the city where your company is legally located.
State/province: Type the state/province where your company is legally located.
Country: In the drop-down list, select the country where your company is legally located.
-
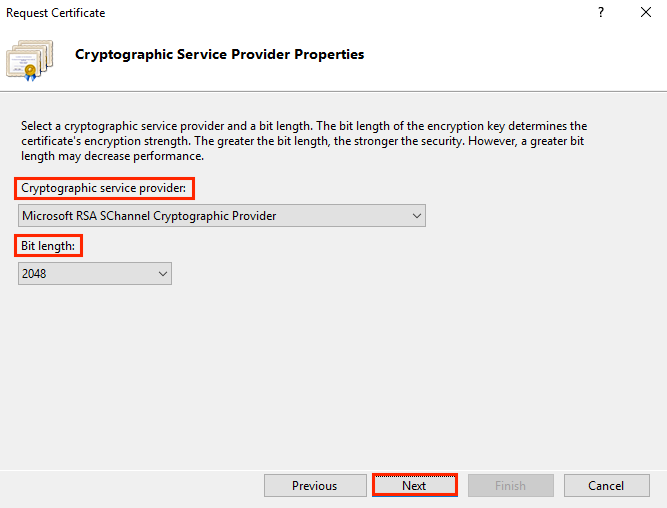
On the Cryptographic Service Provider Properties page, provide the information below and then click Next:
Cryptographic service provider: In the drop-down list, select Microsoft RSA SChannel Cryptographic Provider, unless you have a specific cryptographic provider.
Bit length: In the drop-down list select 2048, unless you have a specific reason for opting for larger bit length.
- On the File Name page, under Specify a file name for the certificate request, click the … box to browse to a location where you want to save your CSR.
Note: Remember the filename that you choose and the location to which you save your csr.txt file. If you just enter a filename without browsing to a location, your CSR will end up in C:\Windows\System32.
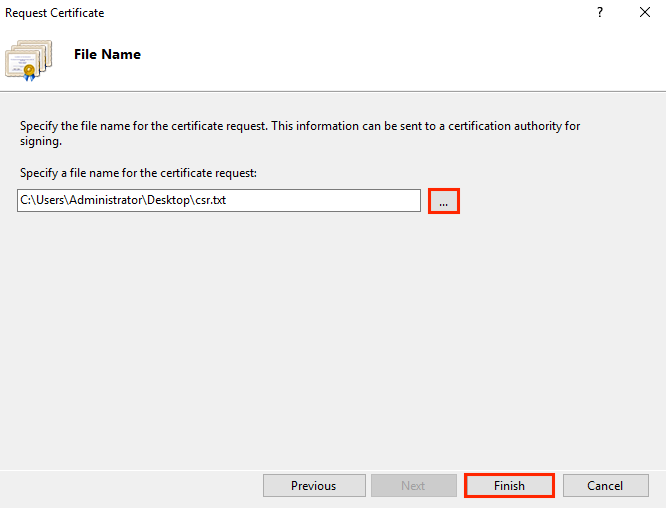
- When you are done, click Finish.
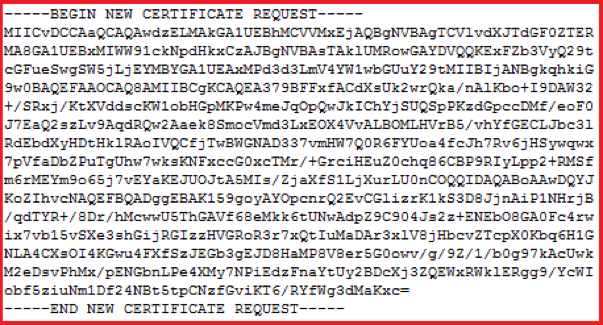
- Use a text editor (such as Notepad) to open the file. Then, copy the text, including the -----BEGIN NEW CERTIFICATE REQUEST----- and -----END NEW CERTIFICATE REQUEST----- tags, and paste it into the order form.
- After you receive your SSL certificate, you can install it.
Updated 7 days ago
